Key Takeaways
-
Calibrating your soil moisture sensor ensures accurate readings, essential for optimal plant health.
-
Understanding the basics of soil moisture sensors helps in effective calibration and usage.
-
Consistent calibration involves using both dry and saturated soil for reference points.
-
Maintaining your sensor by preventing corrosion and ensuring stable power supply increases its longevity.
-
Environmental factors like temperature and soil composition can impact sensor readings, so adjust accordingly.
Full Calibration Process for Soil Moisture Sensors
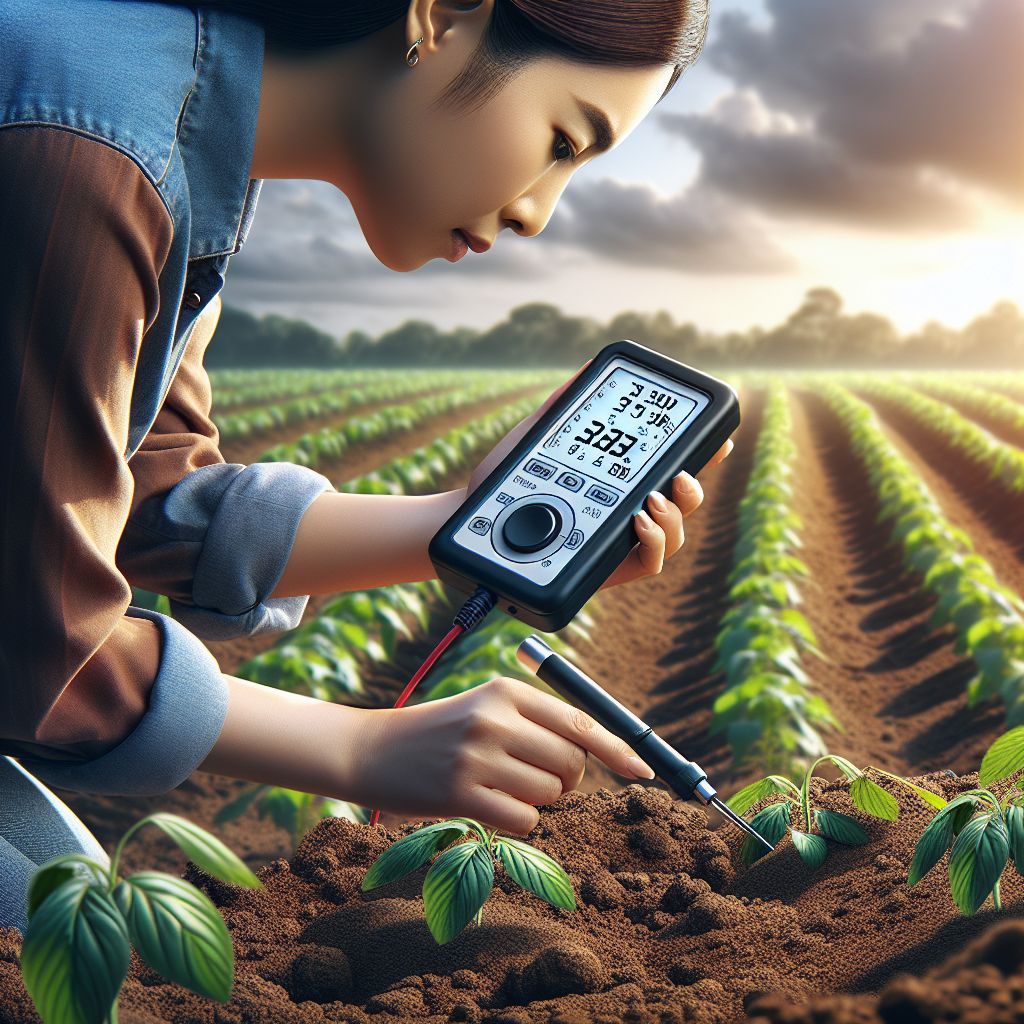
Calibrating your soil moisture sensor involves several steps to ensure it provides accurate and reliable readings. This process is essential for maintaining the health of your plants by ensuring they receive the right amount of water. Let’s break down the full calibration process step-by-step.
Identify Your Sensor Type

“5 Types Of Soil Sensors – Which Is Best …” from www.renkeer.com
The first step in the calibration process is to identify the type of soil moisture sensor you are using. As mentioned earlier, there are primarily two types: resistive and capacitive. Knowing your sensor type will help you follow the appropriate calibration method. Check the manufacturer’s manual or specifications to determine your sensor type.
Preparation Before Calibration
Before you start calibrating, gather all the necessary materials:
-
Your soil moisture sensor
-
A container for soil samples
-
Dry soil
-
Water
-
A measuring cup
-
A notebook or device to record readings
Having these materials ready will make the calibration process smoother and more efficient. For detailed instructions, you can refer to this Soil Moisture Sensor Calibration guide.
Calibrate Using Dry and Saturated Soil
To calibrate your soil moisture sensor, you’ll need to measure its readings in both dry and fully saturated soil. Here’s how:
-
Dry Soil Calibration: Fill a container with dry soil. Insert the sensor probes into the soil and take a reading. Record this value as your “dry soil” reference point.
-
Saturated Soil Calibration: Now, thoroughly water the soil until it is fully saturated but not waterlogged. Insert the sensor probes again and take a reading. Record this value as your “saturated soil” reference point.
These two reference points will help you calibrate the sensor accurately.
Testing and Adjusting Your Sensor
After obtaining the dry and saturated soil readings, you can adjust your sensor settings to ensure accurate measurements. Most sensors come with a calibration function that allows you to input these reference values. Follow the manufacturer’s instructions to complete this step.
Once calibrated, test your sensor in various soil conditions to verify its accuracy. Take readings in slightly damp, moderately wet, and nearly dry soil to ensure the sensor provides consistent and reliable measurements.
Why Accurate Soil Moisture Measurement Matters
Accurate soil moisture measurement is crucial for maintaining healthy plants in a greenhouse. When you know exactly how much moisture is in the soil, you can water your plants more efficiently. This prevents both overwatering and underwatering, which can cause significant damage to plant health.
Overwatering can lead to root rot, mold, and other diseases. On the other hand, underwatering can stress the plants, causing wilting and stunted growth. Therefore, having a calibrated soil moisture sensor ensures that your plants get just the right amount of water they need to thrive.
The Basics of Soil Moisture Sensors
Soil moisture sensors come in different types, but they all serve the same basic function: measuring the volumetric water content in the soil. Typically, these sensors consist of two main parts: the soil moisture probe and the soil moisture module.
The soil moisture probe is inserted into the soil. It usually consists of two conductive metal rods (probes) that measure the resistance of the soil. The soil moisture module processes the data from the probe and provides a readable output.
There are primarily two types of soil moisture sensors: resistive and capacitive. Resistive sensors measure the electrical resistance between the probes, which varies with moisture levels. Capacitive sensors, on the other hand, measure changes in the dielectric permittivity of the soil. Both types have their pros and cons, but capacitive sensors are generally less prone to corrosion.
How to Calibrate Your Soil Moisture Sensor
Calibrating your soil moisture sensor is essential for obtaining accurate readings. Here’s a step-by-step guide to help you through the process:
-
Identify Your Sensor Type: Know whether you have a resistive or capacitive sensor. This will guide your calibration process.
-
Preparation Before Calibration: Gather all necessary materials, including dry soil, water, a container, and your sensor.
-
Calibrate Using Dry and Saturated Soil: First, measure the sensor reading in completely dry soil. Then, measure it in fully saturated soil.
-
Testing and Adjusting Your Sensor: Use these readings to adjust your sensor settings for accurate moisture measurement.
Tips for Optimal Calibration and Use
Avoid Corrosion
Many soil moisture sensors are prone to corrosion if left in the soil for extended periods. This is especially true for resistive sensors. To avoid this, consider using capacitive sensors, which are less susceptible to corrosion. If you must use resistive sensors, make sure to regularly check and clean the probes.
Ensure Consistent Readings
Consistency is key when it comes to soil moisture measurement. Take multiple readings at different times to get a more consistent average soil moisture level. This helps in making more informed decisions about watering.
Check Power Supply Stability
A stable power supply is crucial for accurate sensor readings. Fluctuations in power can cause erratic readings, leading to incorrect watering decisions. Ensure that your sensor is connected to a reliable power source. For more on integrating technology in your greenhouse, check out smart greenhouse systems.
The Role of Soil Condition in Calibration
The condition of the soil plays a significant role in the accuracy of your soil moisture sensor readings. Different soil types and compositions can affect the sensor’s performance. Understanding these factors will help you adapt your calibration process accordingly.
Understanding Soil Types
Soil types vary widely, from sandy to clayey, and each type has different water-holding capacities. Sandy soils drain quickly and may require more frequent watering, while clayey soils retain water longer. Knowing your soil type is crucial for accurate calibration.
Impact of Soil Composition
Soil composition, including the proportion of sand, silt, and clay, affects the sensor’s readings. For example, sandy soils have lower water-holding capacity compared to clayey soils. Organic matter in the soil also influences moisture retention. Therefore, it’s essential to consider soil composition when calibrating your sensor.
Adapting Calibration to Different Soils
To adapt your calibration process to different soil types, you may need to calibrate your sensor separately for each soil type in your greenhouse. For instance, if you have both sandy and clayey soils, perform the dry and saturated soil calibration for each type. This will ensure accurate readings across different soil conditions.
Maintaining Your Soil Moisture Sensor
Proper maintenance of your soil moisture sensor is essential for its longevity and accuracy. Regular maintenance routines can prevent issues and ensure consistent performance. For more detailed instructions, check out this Soil Moisture Sensor Calibration Guide.
Routine Maintenance
Regularly check your sensor for any signs of wear or damage. Clean the probes to remove any soil residue that may affect readings. If you’re using a resistive sensor, inspect it for corrosion and clean it as needed. For more comprehensive tips, check out these summer greenhouse maintenance tips.
Monitoring Soil Conditions
Keep an eye on the soil conditions in your greenhouse. Regularly monitor the moisture levels and compare them with your sensor readings. This helps you identify any discrepancies and recalibrate the sensor if necessary.
Troubleshooting Common Issues
If you encounter any issues with your soil moisture sensor, refer to the manufacturer’s troubleshooting guide. Common problems include erratic readings, sensor drift, and power supply issues. Addressing these problems promptly will ensure your sensor continues to provide accurate measurements.
For instance, if you notice that your sensor readings are inconsistent, check for any loose connections or damaged probes. Ensuring a stable power supply and avoiding corrosion can also help prevent many common issues. For more tips, you can refer to our summer greenhouse maintenance guide.
Conclusion: The Benefits of Proper Calibration
Proper calibration of your soil moisture sensor is essential for maintaining healthy plants and efficient water usage in your greenhouse. By following the steps and tips outlined in this guide, you can ensure that your sensor provides accurate and reliable readings. For more advanced techniques, consider exploring smart greenhouse systems to further optimize your greenhouse operations.
“Soil Moisture Sensor Calibration …” from www.instructables.com
Accurate soil moisture measurement allows you to water your plants more effectively, preventing both overwatering and underwatering. This leads to healthier plants, reduced water waste, and a more productive greenhouse environment.
Frequently Asked Questions (FAQ)
How often should I calibrate my soil moisture sensor?
It’s recommended to calibrate your soil moisture sensor at least once every season or whenever you notice inconsistencies in the readings. Regular calibration ensures that your sensor remains accurate and reliable. For more detailed instructions, you can refer to this soil moisture sensor calibration guide.
Can I use the same calibration for all types of soil?
No, different soil types have varying water-holding capacities and compositions. It’s essential to calibrate your sensor separately for each soil type in your greenhouse to ensure accurate readings.
For example, sandy soil and clayey soil will have different calibration points due to their distinct properties. By calibrating for each soil type, you can obtain more precise moisture measurements.
What are the signs that my sensor needs recalibration?
Several signs indicate that your soil moisture sensor may need recalibration, especially if you are dealing with smart greenhouse systems and notice inconsistencies in readings.
-
Inconsistent or erratic readings
-
Readings that don’t match the actual soil conditions
-
Noticeable drift in sensor accuracy over time
If you observe any of these signs, it’s a good idea to recalibrate your sensor to ensure accurate measurements.
Calibrating a greenhouse soil moisture sensor is essential for accurate readings and optimal plant growth. Start by selecting a reliable sensor and ensure it is properly installed. Next, immerse the sensor in water and allow it to stabilize, then record the reading. Repeat this process with dry soil to establish a baseline. Regular calibration checks are recommended to maintain accuracy. For more information on advanced greenhouse systems, check out our guide on smart greenhouse systems.