Key Takeaways
-
Inspect your greenhouse regularly to catch leaks early before they become bigger problems.
-
Use silicone caulking or polyethylene repair tape for quick fixes on small leaks.
-
For larger leaks, consider replacing damaged panels or seeking professional help if the task seems too daunting.
-
Prevent future leaks by using weatherproofing materials and techniques during regular maintenance.
-
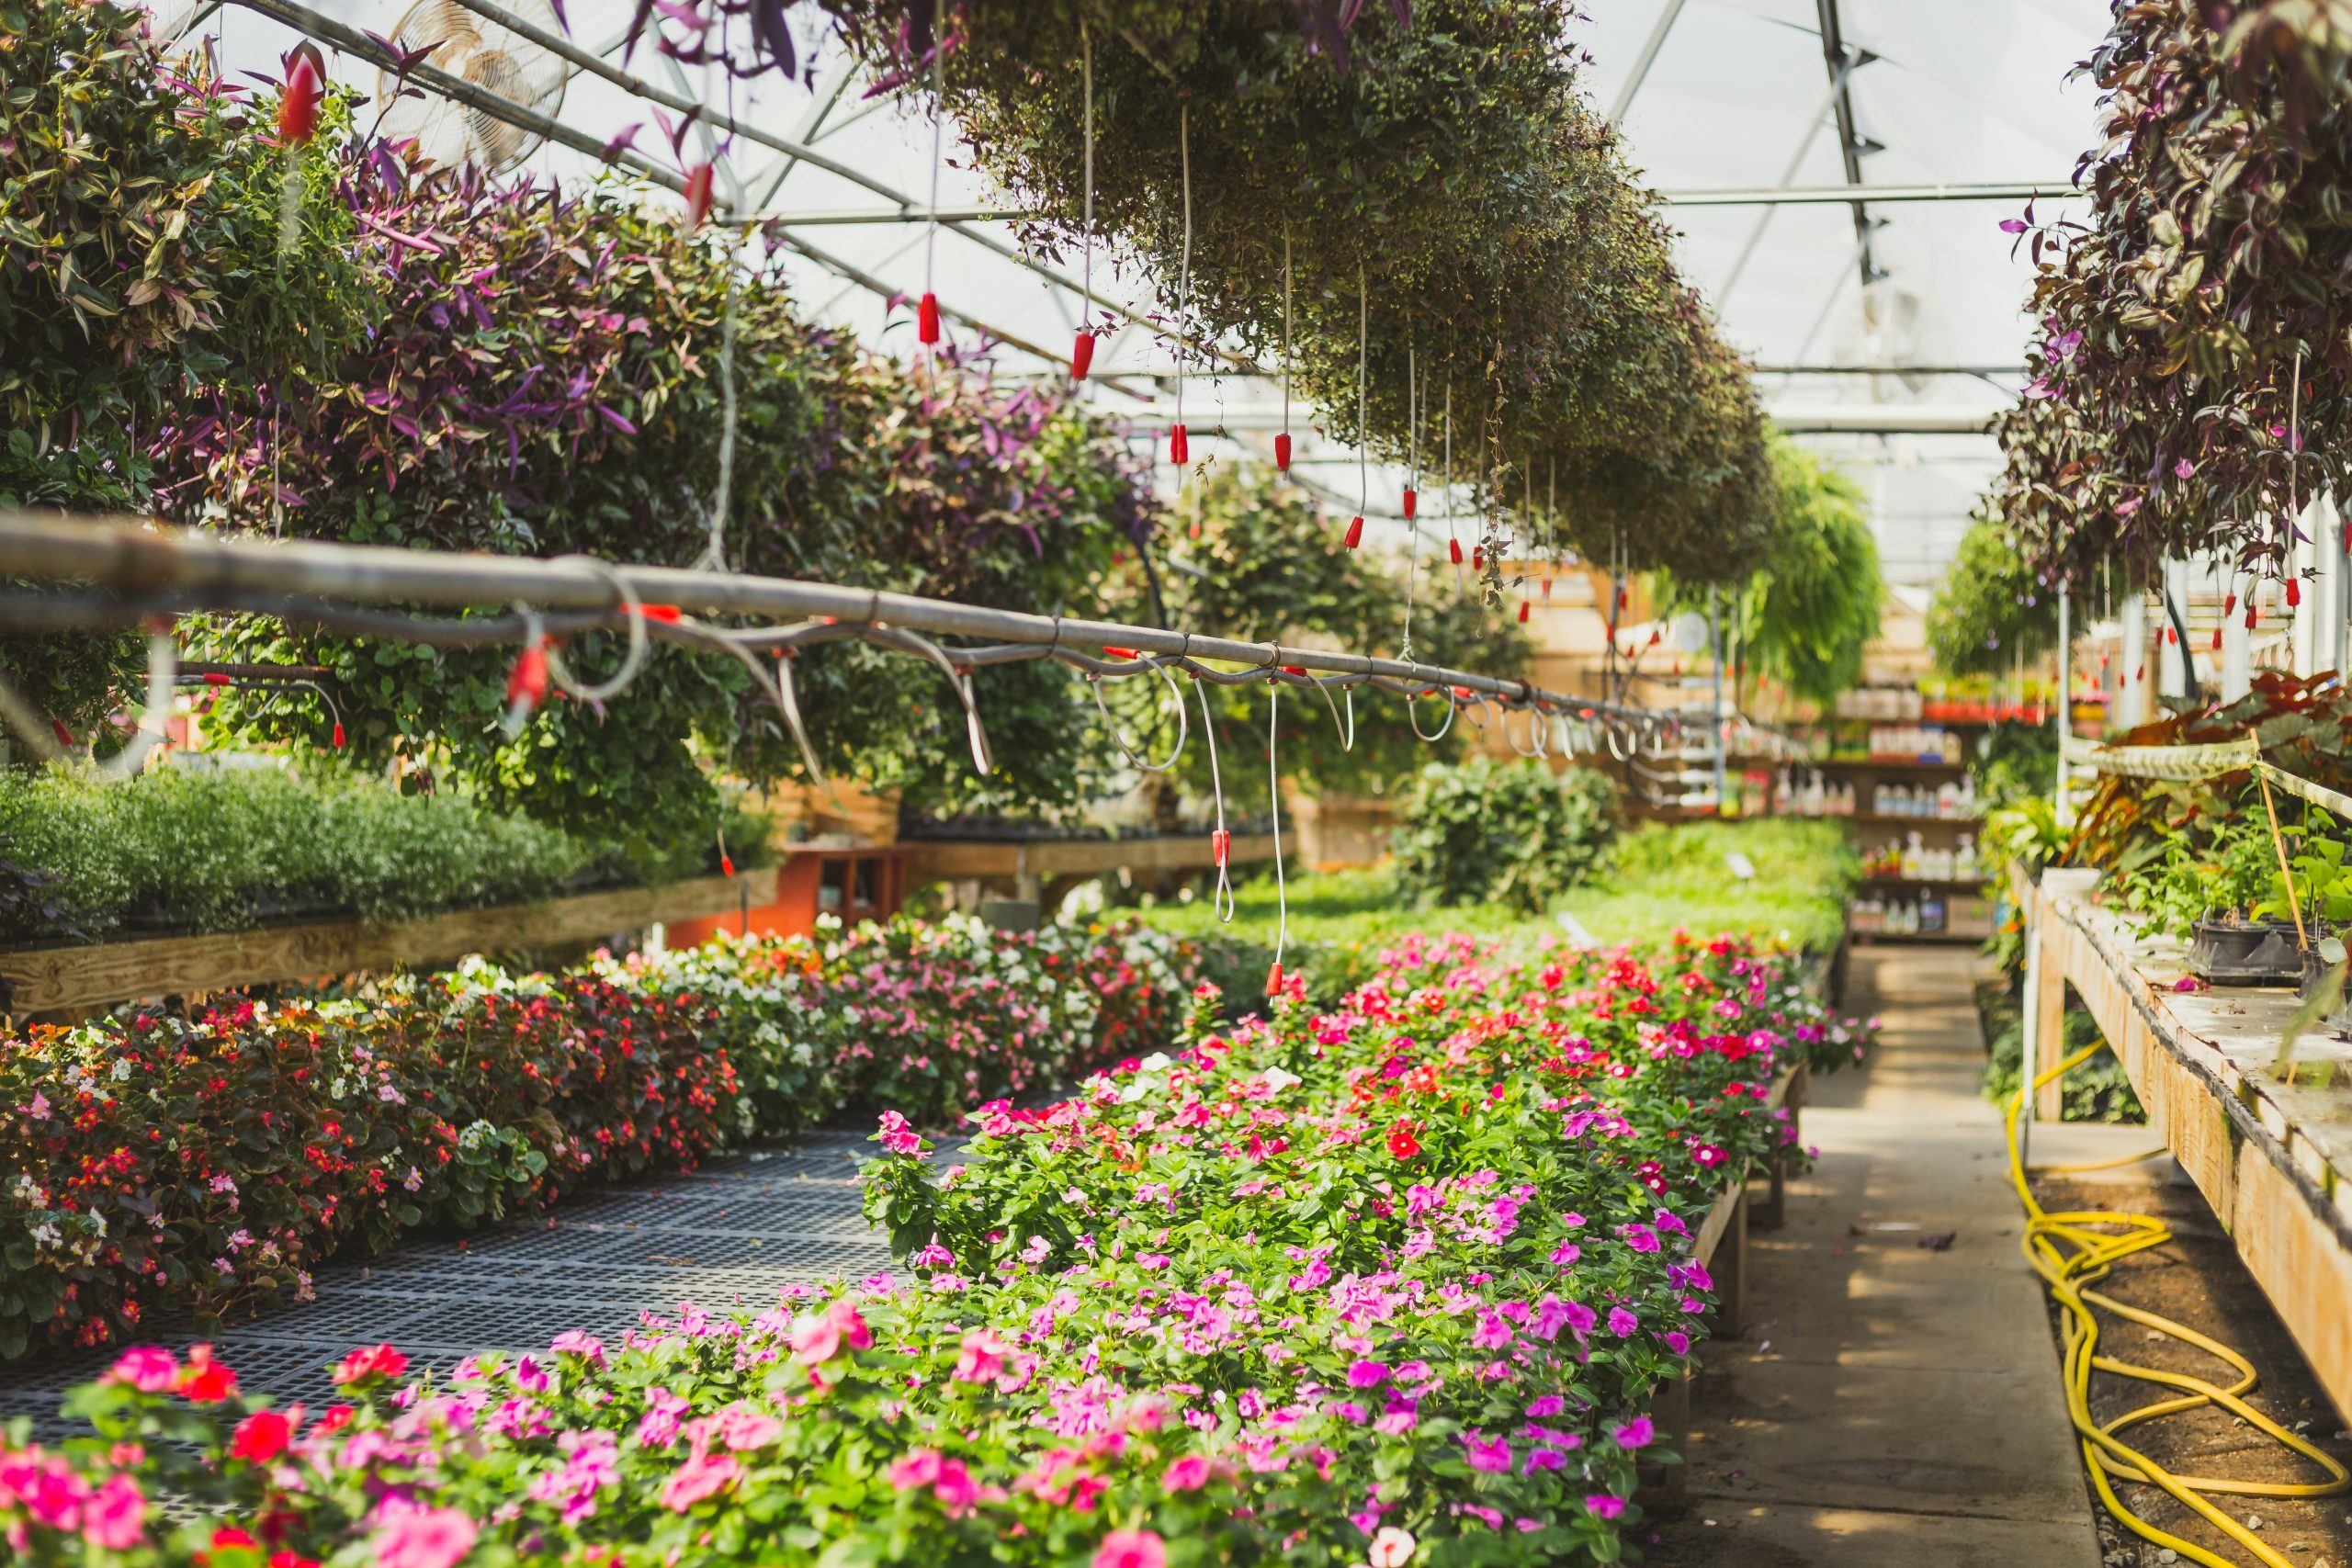
A well-maintained greenhouse not only prevents leaks but also creates an ideal growing environment for your plants.
Spot the Leak: Starting Your Greenhouse Repair Journey
First things first, you need to find the source of the leak. This might seem daunting, but it’s all about being methodical. Start by examining the most common trouble spots: the roof, especially around vents and joints. These areas tend to be the usual suspects when it comes to leaks. Check on a clear day so you can easily spot any holes or gaps that might be letting in water.
Remember, even the smallest leak can lead to big problems, so it’s important to be thorough. Look for signs of moisture or water damage on the floor and walls of your greenhouse. Water stains, mold, or pooled water are telltale signs that there’s a leak nearby. Also, pay close attention to the frame – rust or discoloration can indicate that water has been seeping through.
Identifying Common Leak Sources
Leaks can occur for various reasons, but some common culprits include:
-
Worn out seals or gaskets around doors and vents.
-
Cracks or tears in the greenhouse panels or covering material.
-
Loose or missing fasteners that secure the greenhouse structure.
Assessing the Damage: What to Look For
Once you’ve identified where the leak is coming from, assess the extent of the damage. Small, superficial cracks might only need a simple sealant to fix, while larger gaps or broken panels might require more extensive repairs or replacements. Take note of what materials your greenhouse is made of, as this will dictate the type of repair method you’ll use.
“Preventing Water Damage…” from www.gardenandgreenhouse.net
It’s also important to consider the age of your greenhouse. If it’s an older structure, it might be time to invest in more durable materials that can better withstand the elements and prevent future leaks.
Preventive Measures: Keeping Your Greenhouse Dry
Now that you know what to look for and how to assess the damage, let’s talk about prevention. Regular maintenance is your first line of defense against leaks. By catching issues early, you can save yourself a lot of time and money down the road. For more detailed guidance, consider following The Essential Greenhouse Sealing Guide which offers tips for a leak-free garden.
Here are some preventive measures to keep in mind:
-
Regularly inspect your greenhouse for any signs of wear and tear, especially after extreme weather conditions.
-
Clean out gutters and downspouts to ensure proper drainage and prevent water buildup.
-
Trim any overhanging branches or vegetation that could potentially damage the greenhouse covering.
Prevention is not just about fixing what’s broken, it’s also about strengthening what’s intact. Applying weatherproofing materials to vulnerable areas can help you avoid leaks altogether.
Regular Maintenance Checks
Set up a schedule for regular maintenance checks. This could be once a month or after every change of season, depending on your local climate and the specific needs of your greenhouse. During these checks, make sure to:
-
Look for any signs of damage or wear on the greenhouse structure and covering.
-
Check that all seals and joints are intact and reapply caulking if necessary.
-
Ensure that all doors, windows, and vents are closing properly and that their seals are in good condition.
Weatherproofing Materials and Techniques
When it comes to weatherproofing, you have several options. Some effective materials and techniques include:
-
Using weatherstripping around doors and windows to prevent drafts and water ingress.
-
Applying a layer of UV-resistant polyethylene film over the greenhouse panels for added protection against the elements.
-
Installing shade cloths or screens to protect against excessive heat and prevent UV damage.
These preventive measures are essential, but sometimes leaks happen despite our best efforts. That’s where DIY repair comes into play. For a comprehensive look at fixing these issues, be sure to check out our Greenhouse Glazing Replacement & Repair Guide. Stay tuned for the next installment where we’ll dive into sealing the deal and fixing those leaks for good.
Sealants and Tapes: A Homeowner’s Best Friend
When you’ve got a small leak, there’s no need to fret. A quick trip to your local hardware store can provide you with the tools you need to fix it fast. Silicone sealants and polyethylene repair tapes are excellent for these minor repairs. They’re easy to apply and can provide a waterproof barrier over any small cracks or holes. Silicone sealant is particularly useful because it’s durable and flexible, which means it can withstand the natural expansion and contraction of your greenhouse materials due to temperature changes.
Here’s how to apply these materials:
-
Clean the area around the leak thoroughly, removing any dirt or debris to ensure the sealant or tape adheres properly.
-
If you’re using silicone sealant, cut the tip of the tube at a 45-degree angle to allow for precise application, and apply it smoothly over the crack or hole.
-
For tape, simply cut a piece large enough to cover the leak with some overlap around the edges, and press it firmly in place.
Remember, these fixes are great for small leaks, but if you’re dealing with a larger issue, it might be time to consider more significant repairs.
Replacing Damaged Panels: A Step-by-Step Guide
If your greenhouse has a panel that’s beyond a simple sealant fix, replacing it is your next best option. This might sound like a big job, but with some patience and the right tools, it’s definitely doable. For a thorough understanding on repairing your greenhouse, consider reading the Essential Greenhouse Sealing Guide.
Here’s a step-by-step guide to help you through the process.
-
Measure the damaged panel carefully to ensure you purchase the right size replacement.
-
Remove any fasteners or clips holding the damaged panel in place. Take care not to damage the surrounding structure.
-
Install the new panel, securing it with new fasteners or clips.
-
Seal the edges of the new panel with silicone caulking to prevent future leaks.
With your new panel in place, your greenhouse should be back to its leak-free state. But sometimes, even with our best DIY efforts, the job can be too complex or time-consuming. That’s when it’s time to call in the pros.

When to Call the Pros: Seeking Professional Help
If you’ve tried to fix the leak and it’s still a problem, or if the damage is extensive, it’s time to seek professional help. Professionals can assess the situation and provide a more permanent solution. They have the tools and expertise to handle larger repairs that might be outside the scope of DIY.
It’s important to know your limits. If you’re not comfortable working with tools or if the repair requires specialized knowledge, it’s better to call a professional. This ensures the job is done safely and correctly, saving you from potential future issues that could arise from an improper fix.
And don’t worry about the cost. Often, the expense of hiring a professional can be offset by the long-term benefits of a well-repaired greenhouse. Plus, many professionals offer warranties on their work, giving you peace of mind.
For example, a homeowner I know attempted to replace a large, cracked acrylic panel on their greenhouse. Despite their best efforts, they couldn’t achieve a watertight seal, and the greenhouse continued to leak every time it rained. After calling in a professional, the panel was replaced and sealed properly, and the greenhouse has been dry ever since.
Evaluating When DIY Isn’t Enough
Here are some signs that it’s time to call a professional:
-
The leak is persistent and recurs after several DIY attempts.
-
The structural integrity of the greenhouse is compromised.
-
You lack the necessary tools or skills to perform the repair safely.
Finding a Reputable Greenhouse Repair Service
When looking for a professional, do your research. Check reviews, ask for references, and make sure they have experience with greenhouses specifically. A reputable service should be able to provide a clear estimate and timeline for the repair work. Don’t be afraid to ask questions and get multiple quotes to ensure you’re getting the best service for a fair price.
Longevity Strategies: Ensuring Future Leak Prevention
After repairing your greenhouse, it’s important to think about long-term strategies to prevent future leaks. Regular maintenance is crucial, but you can also take steps to enhance the durability of your greenhouse.
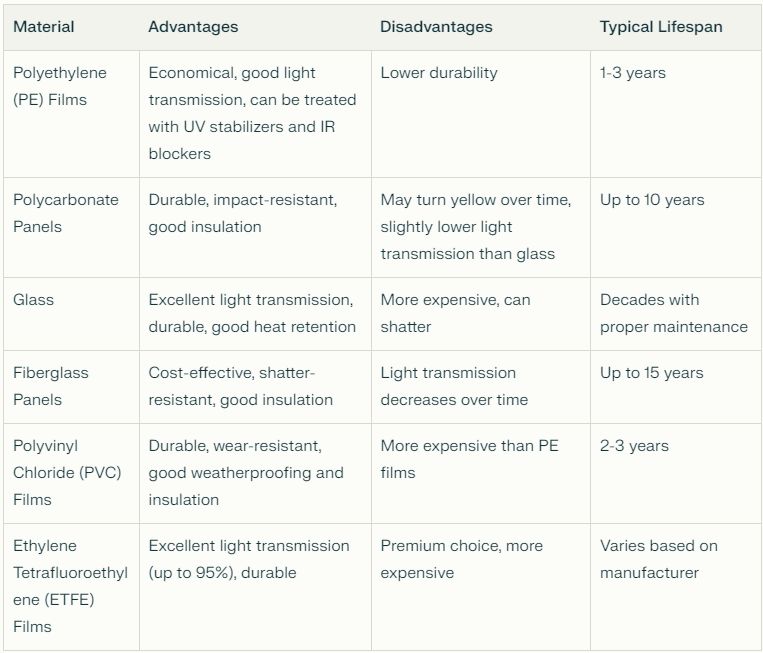
Consider upgrading to more resilient materials that can better withstand the elements. For example, polycarbonate panels are stronger and more durable than traditional glass or plastic, and they offer excellent insulation properties.
Upgrading Materials for Enhanced Durability
Here’s what to consider when upgrading your greenhouse materials:
-
Look for materials with a high resistance to UV rays to prevent degradation over time.
-
Choose materials that are impact-resistant to protect against damage from debris or severe weather.
-
Invest in higher-quality seals and weatherstripping for doors and windows.
|
|
|
Upgrading may require an upfront investment, but it pays off in the long run by reducing the frequency and severity of repairs needed. For a comprehensive understanding of the materials and methods that can extend the life of your greenhouse, consider reading this greenhouse glazing replacement and repair guide.
Beyond the Fix: Ongoing Greenhouse Care
Finally, remember that taking care of your greenhouse is an ongoing process. Regular cleaning, inspecting, and immediate attention to small issues will keep your greenhouse in prime condition for years to come. Keep a maintenance log to track what you’ve done and when, so you can stay on top of any potential problems before they escalate.
And most importantly, enjoy the fruits of your labor. A well-maintained greenhouse is not only a joy to work in but also provides the optimal environment for your plants to thrive.
Seal the Success: Enjoying Your Revitalized Greenhouse
Once you’ve addressed the leaks and taken steps to prevent new ones, it’s time to enjoy your revitalized greenhouse. With a solid structure over your head and healthy plants growing within, you’ll have a space that’s both functional and inviting.
The Rewards of a Well-Maintained Greenhouse
The benefits of a leak-free greenhouse extend beyond just keeping your plants dry. You’ll save money on water damage repairs, prevent mold and mildew growth, and create a stable environment for your plants to flourish. So take pride in your efforts – your plants will thank you for it, and you’ll have a beautiful, productive space to show for it.
In the end, whether you’re a seasoned green thumb or a budding gardener, keeping your greenhouse in top condition is a rewarding endeavor. With these tips and a little know-how, you can tackle any leaks that come your way and ensure your greenhouse remains a haven for your horticultural pursuits.
Harvesting the Benefits: A Leak-Free Environment for Plants
When your greenhouse is leak-free, you’re not just preventing water from dripping onto your head. You’re creating a controlled environment where your plants can thrive. This means stable temperatures, consistent humidity levels, and protection from the elements. It’s about giving your plants the best possible chance to grow strong and healthy. Plus, you’ll avoid the frustration of dealing with water damage and the potential loss of precious plants due to mold or rot.
Frequently Asked Questions (FAQ)
You’ve got questions, I’ve got answers. Here are some of the most common questions about greenhouse leak repair, along with the knowledge you need to tackle them with confidence.
Can I repair my greenhouse leak in wet conditions?
It’s best to wait for a dry day to repair your greenhouse leak. Many sealants and tapes require a clean, dry surface to adhere properly and cure correctly. If you try to patch up a leak while it’s wet, you might find that the material doesn’t stick or the seal isn’t watertight. So, hold off on the repair until the weather is on your side.
What are the best sealants for greenhouse repair?
For most greenhouse repairs, silicone caulking is a solid choice. It’s waterproof, flexible, and can withstand a range of temperatures, which is exactly what you need in the fluctuating environment of a greenhouse. Another great option is polyethylene repair tape, which is specifically designed to patch up tears and holes in greenhouse covers.
How often should I inspect my greenhouse for leaks?
Make it a habit to inspect your greenhouse at least once a season. If you live in an area with severe weather changes, you might want to check it more frequently. After any major storm or bout of bad weather, give your greenhouse a once-over to ensure it’s still holding up well.
Is it cost-effective to repair a greenhouse leak myself?
Absolutely. Most small leaks can be repaired easily and inexpensively with materials like silicone sealant or repair tape. Doing it yourself saves you the cost of hiring a professional. However, if the damage is extensive, or you’re unsure about how to proceed, it’s worth getting a professional’s assessment.
Can large greenhouse leaks be repaired, or is replacement the only option?
Large leaks can often be repaired, but it depends on the extent of the damage. If an entire panel is cracked or a significant part of the structure is compromised, replacing the damaged parts might be the most effective solution. If you’re unsure, consult with a professional to weigh your options and decide on the best course of action.