Key Takeaways
- RuuviTags are Bluetooth sensors ideal for IoT projects with environmental monitoring.
- The Raspberry Pi acts as a versatile hub for connecting RuuviTags to the internet.
- You can program Arduino boards to interface with RuuviTags for data collection.
- Grafana and InfluxDB on Raspberry Pi create a powerful combo for visualizing sensor data.
- Step-by-step guidance can help even beginners integrate RuuviTag with Arduino and Raspberry Pi.
Getting Started with RuuviTag and Arduino on Raspberry Pi
Embarking on an IoT project can seem daunting, but let me assure you, it’s a journey worth taking. Imagine having the power to monitor your environment, whether it’s the temperature in your greenhouse or the humidity in your basement, all from the palm of your hand. That’s what we’re going to accomplish by integrating RuuviTag sensors with an Arduino, all connected through a Raspberry Pi.
Your Launchpad into IoT Innovation
First things first, we need to understand what these components are. RuuviTags are robust, battery-powered Bluetooth sensors that can measure temperature, humidity, air pressure, and motion. The Raspberry Pi is a small computer that can run various operating systems and programs. And the Arduino? It’s a microcontroller board that’s great for reading signals from sensors and controlling motors, lights, and more.
Gathering the Essentials for Your Project
First, gather the necessary items to get started:
- A RuuviTag sensor (or several, depending on your project scope)
- A Raspberry Pi (any model will do, but I prefer the Raspberry Pi 3 or 4 for their enhanced capabilities)
- An Arduino board (the Uno is a great starter board)
- Jumper wires for connecting the Arduino to the RuuviTag
- Access to a Wi-Fi network
- A computer to program your Raspberry Pi and Arduino
Once you’ve gathered your materials, it’s time to roll up your sleeves and dive into the world of IoT.
Step-by-Step Integration Process
Integrating your RuuviTag with an Arduino and Raspberry Pi might sound complex, but I’ll walk you through it step by step. We’ll start by setting up your Raspberry Pi, then connect your RuuviTag to your Arduino, and finally, bring it all together.
- Setting up the Raspberry Pi with Raspbian OS and necessary software
- Connecting the RuuviTag to the Arduino via Bluetooth
- Programming the Arduino to read data from the RuuviTag
- Sending data from the Arduino to the Raspberry Pi
- Visualizing your data with Grafana and storing it with InfluxDB
Setting Up Your Raspberry Pi Environment
Before we can start collecting data, we need to set up our Raspberry Pi. This involves installing the Raspbian operating system and making sure it’s connected to the internet. Once that’s done, we’ll install two critical pieces of software: Grafana and InfluxDB. Grafana will allow us to create dashboards to visualize the data collected from our RuuviTag, while InfluxDB will store this data efficiently.
Here’s how to get your Raspberry Pi ready:
- Download the latest Raspbian image from the Raspberry Pi website.
- Flash it onto a microSD card using software like BalenaEtcher.
- Insert the microSD card into your Raspberry Pi and power it up.
- Follow the on-screen instructions to complete the setup, including connecting to your Wi-Fi network.
- Open the terminal and install InfluxDB and Grafana with the following commands:
sudo apt-get updatesudo apt-get install influxdb
sudo apt-get install grafana
With your Raspberry Pi set up and ready, we’re now going to focus on the next crucial piece of the puzzle: the Arduino.
Connecting RuuviTag with Your Arduino
Now, let’s get our hands on the Arduino. We’re going to use it as a bridge between our RuuviTag and Raspberry Pi. The Arduino will read the Bluetooth signals from the RuuviTag and then send this data to the Raspberry Pi via a serial connection.
Here’s what you need to do:
- Connect your Arduino to your computer using a USB cable.
- Open the Arduino IDE and make sure the correct board and port are selected.
- Use a Bluetooth module compatible with Arduino, like the HC-05, and connect it to the Arduino’s serial pins.
- Pair the Bluetooth module with your RuuviTag following the module’s instructions.
With the Bluetooth connection established, it’s time to program your Arduino to understand the RuuviTag’s data.
Stay tuned for the next section, where we’ll dive into programming the Arduino and setting up communication with the Raspberry Pi. This is where things start to get really exciting!
Establishing Communication Between Arduino and Raspberry Pi
With your Arduino now able to understand RuuviTag’s data, it’s crucial to set up a line of communication with the Raspberry Pi. This is done through a serial connection, which allows data to travel between the two devices. To facilitate this, we’ll write a simple Arduino script that reads the sensor data and sends it over to the Raspberry Pi using serial communication.
Here’s a simplified version of what the Arduino code would look like:
void setup() {
  Serial.begin(9600); // Start serial communication at 9600 baud rate
}

void loop() {
  // Assume 'sensorValue' is the data read from the RuuviTag
  float sensorValue = readSensorData();
  Serial.println(sensorValue); // Send the sensor data to the Raspberry Pi
  delay(1000); // Wait for a second before sending new data
}
Once the Arduino is programmed and sending data, you’ll need to write a corresponding Python script on the Raspberry Pi to read the serial input. This script will take the incoming data and store it in InfluxDB, where it can be visualized with Grafana.
Visualization and Data Handling
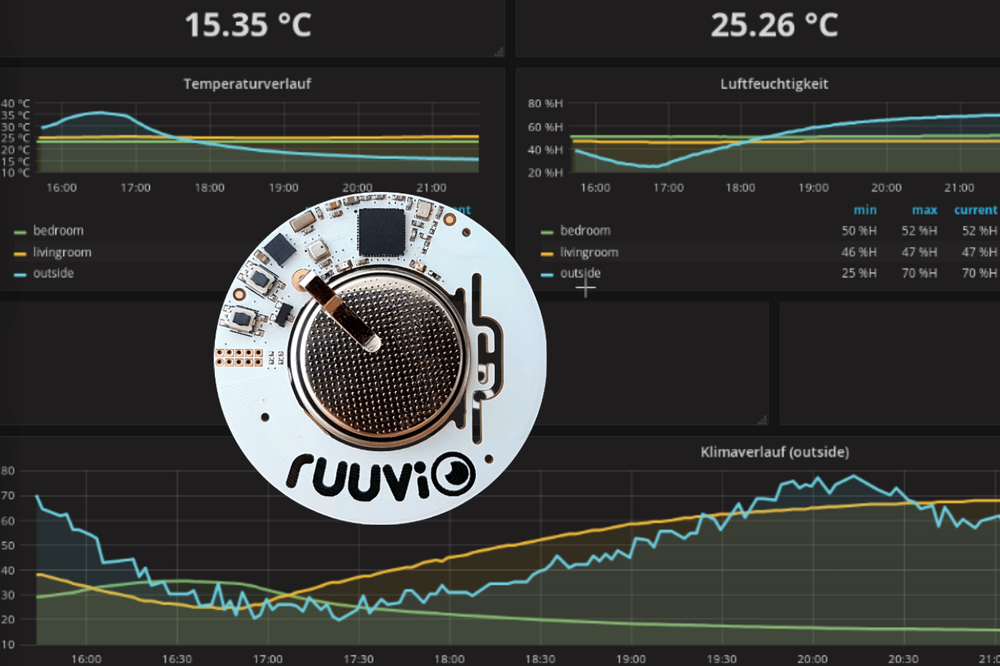
With our data pipeline flowing, it’s time to make sense of the data. Visualization is key in IoT projects as it helps us understand the patterns and anomalies in the environmental conditions we’re monitoring. Grafana offers a powerful and intuitive way to create dashboards that can display data in real-time, giving you insights at a glance.
Introducing Grafana Dashboards
Grafana is an open-source platform for monitoring and observability. It allows you to query, visualize, alert on, and understand your metrics no matter where they are stored. In our case, we’ll use it to create dynamic dashboards that display the data from our RuuviTags. You can customize these dashboards with various types of graphs, gauges, and tables to suit your project’s needs.
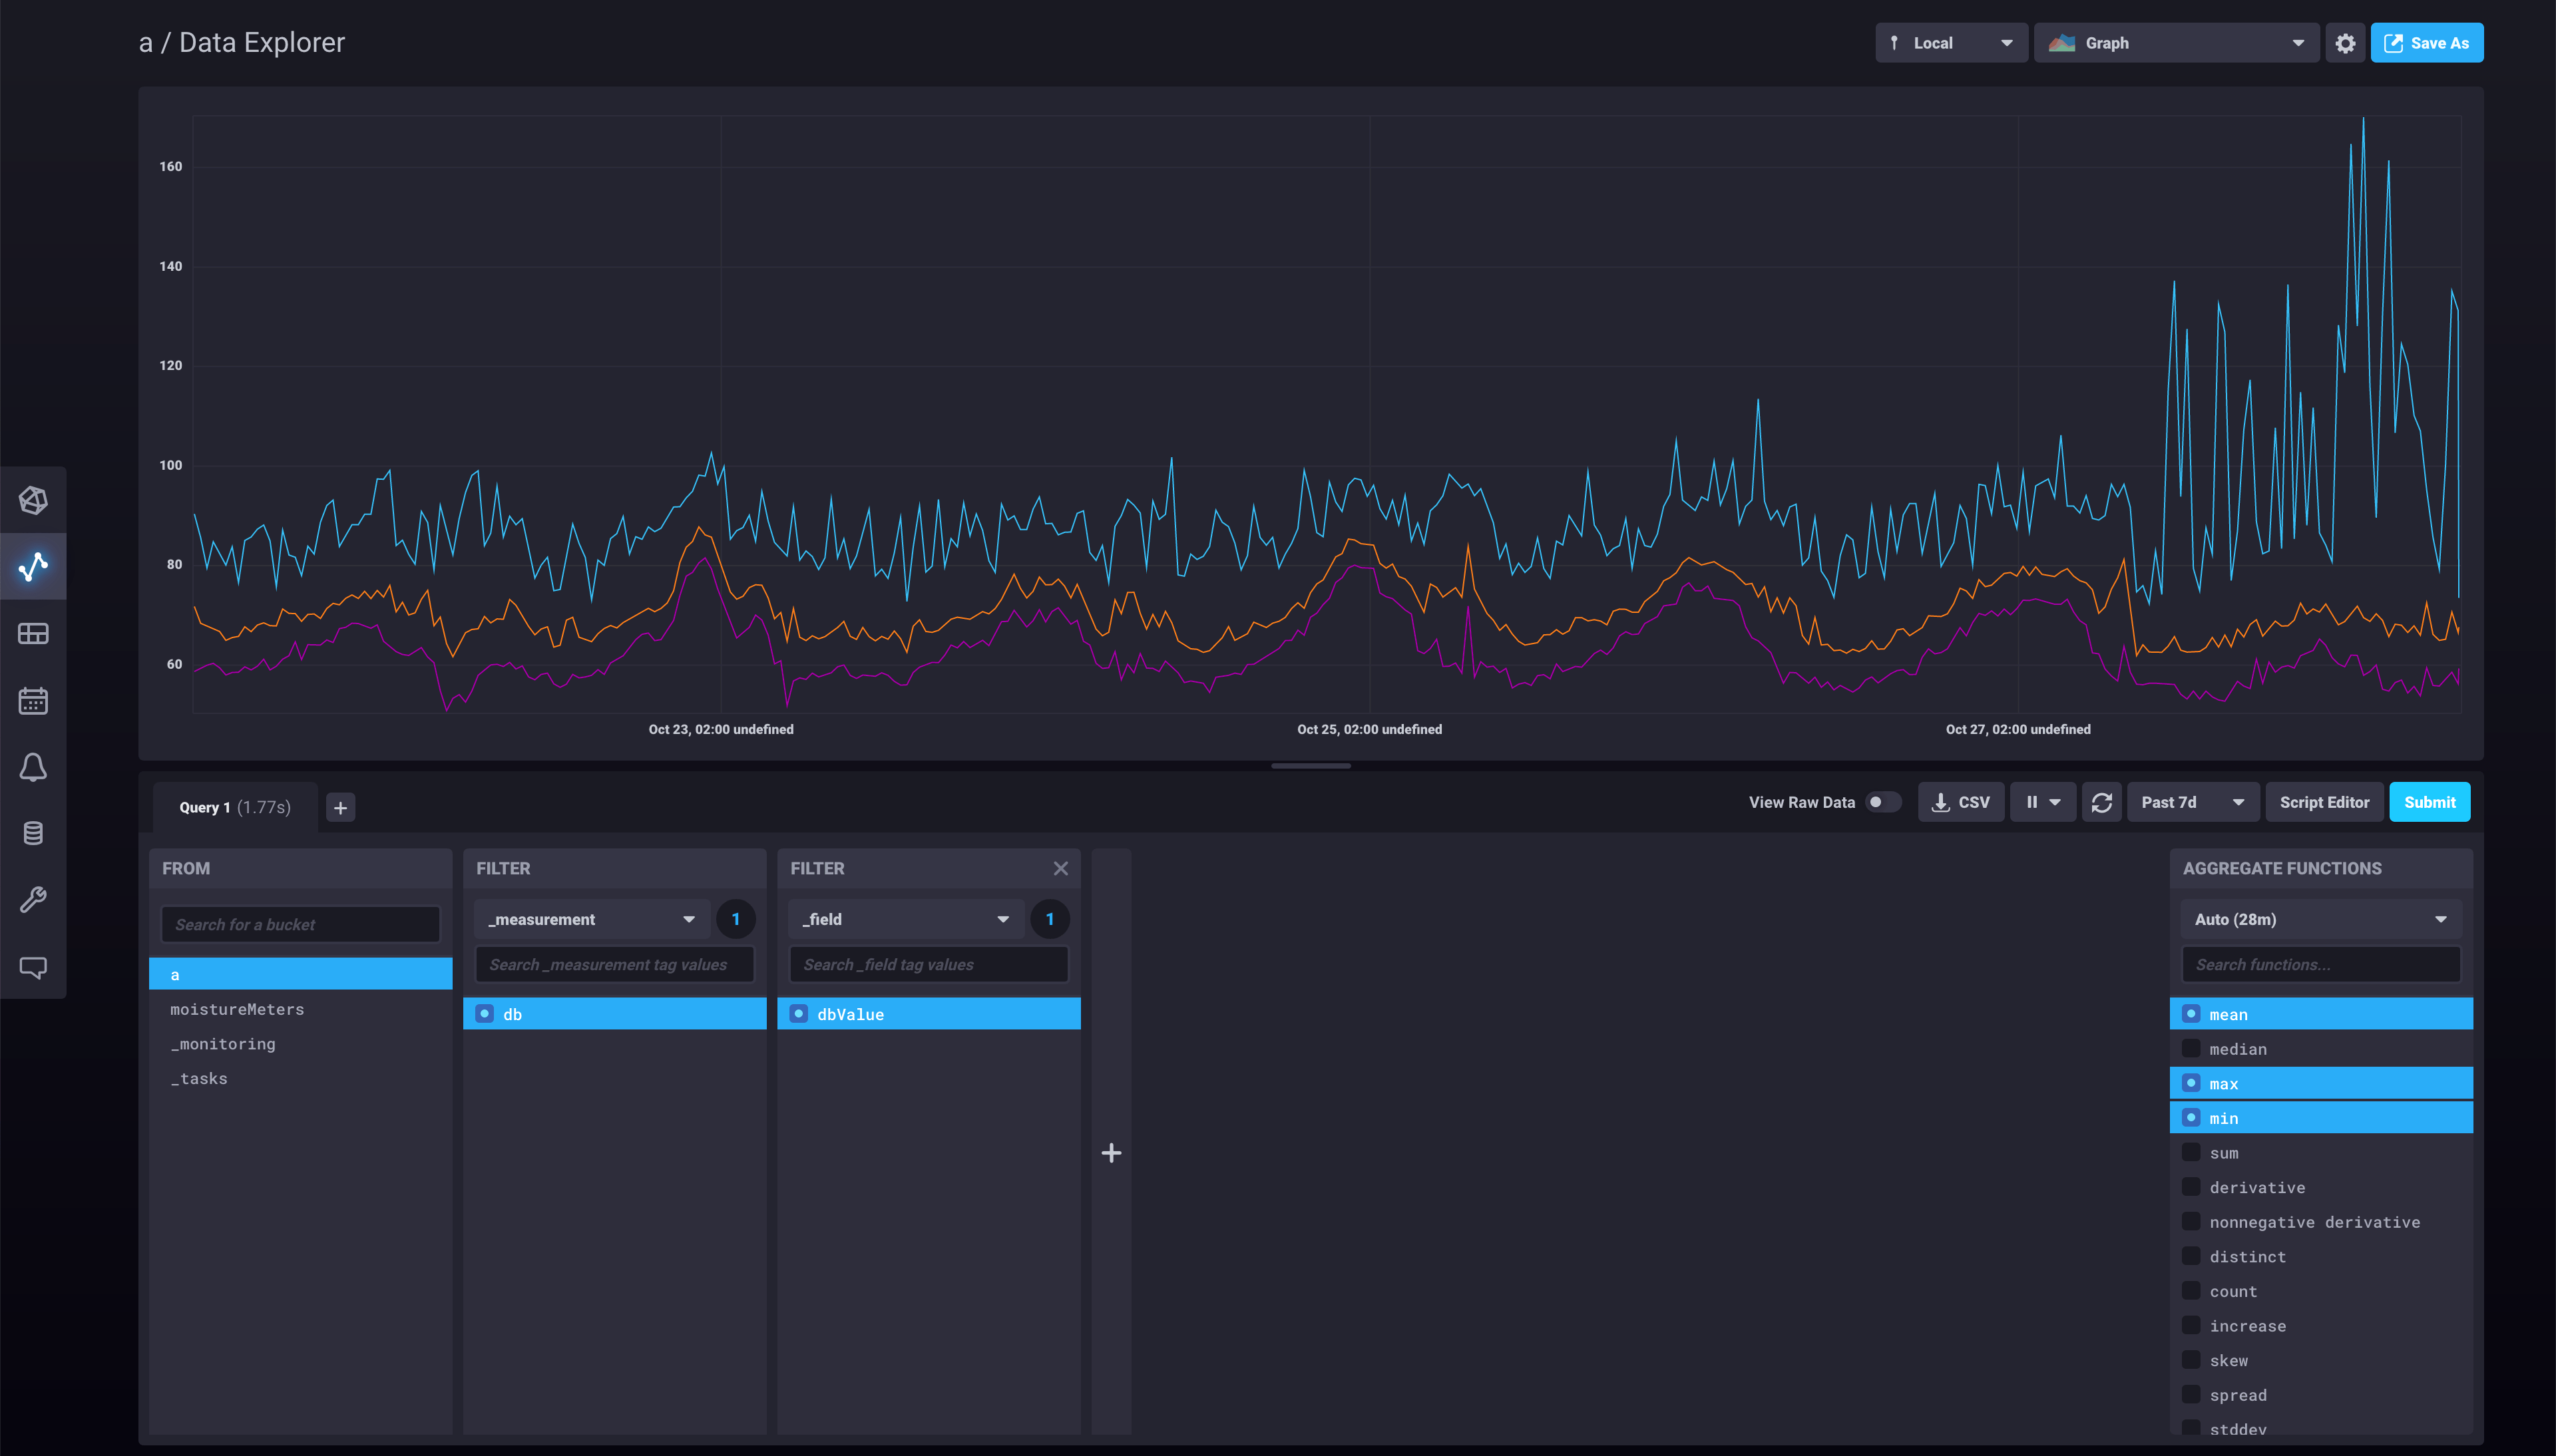
Leveraging InfluxDB for Data Storage
InfluxDB is a time-series database designed to handle high write and query loads. It’s an ideal choice for IoT applications like ours because it’s built to store and retrieve data that changes over time, such as temperature or humidity readings from RuuviTags. The integration with Grafana means you can easily turn the raw data stored in InfluxDB into beautiful and informative visualizations.
“InfluxDB: Introduction” from www.stackhero.io
Going Wireless: IoT Connectivity Options
One of the most exciting aspects of IoT is the ability to go wireless, which gives you flexibility in sensor placement and mobility. The RuuviTag is equipped with Bluetooth Low Energy (BLE), which is perfect for IoT applications due to its low power consumption and decent range.
Exploring BLE Capabilities with RuuviTag
“BLE – Node-RED – InfluxDB and Grafana” from tobru.ch
The RuuviTag uses BLE to transmit its data, which the Arduino’s Bluetooth module can pick up. This wireless communication is key for deploying sensors in places where wires would be impractical or unsightly. Plus, with BLE’s low energy profile, your RuuviTags can run for years on a single coin cell battery.
Securing IoT Communication
When you’re sending data wirelessly, security should be at the forefront of your mind. It’s essential to ensure that the data transmitted between your RuuviTags, Arduino, and Raspberry Pi is secure. Using encrypted communication protocols and secure authentication methods can help protect your data from being intercepted by unauthorized parties.
Advanced Applications and Creative Projects
Now that you’ve got the basics down, let’s talk about the endless possibilities this setup offers. Expand your project by adding more sensors, controlling devices based on sensor input, or integrating with web services to send notifications to your phone when certain conditions occur.
Environmental Monitoring Solutions
Whether you’re looking to monitor the climate in your wine cellar, track the growth conditions in your garden, or even set up a weather station, RuuviTags are up to the task. With the ability to measure a range of environmental factors, these sensors can provide valuable data that you can analyze and act upon.
Home Automation Systems Leveraging IoT
Imagine your home responding to environmental changes automatically. Your curtains could close if the sunlight gets too intense, or your humidifier could turn on when the air gets dry. By integrating RuuviTags with home automation systems, you can create a smart home that not only monitors conditions but also responds to them.
Troubleshooting and Fine-Tuning
As with any tech project, you might run into some bumps along the way. To resolve common issues like connectivity problems, data inconsistency, and power management, you can perform some troubleshooting. Check your connections, review your code for errors, and make sure your power sources are reliable.
Remember, patience and persistence are key. With every challenge you overcome, you’ll learn more and become better equipped to tackle even more complex projects. And that’s what being a tech enthusiast is all about—embracing the learning process and pushing the boundaries of what’s possible.
Stay tuned for the final section, where we’ll wrap up with some frequently asked questions and provide you with the confidence to embark on your own IoT adventures!
Now, as we’ve journeyed through the integration of RuuviTag with Arduino and Raspberry Pi, let’s address some common questions and give you the final pieces of advice to embark on your IoT project with confidence.
FAQ
What Is RuuviTag and Why Use It?
RuuviTag is a compact, wireless sensor that tracks a multitude of environmental variables such as temperature, humidity, air pressure, and motion. Its robust build and long battery life make it an excellent choice for IoT projects that involve environmental monitoring. You might use it to keep an eye on your home’s conditions or to gather data for a weather station project.
Can I Use Other Raspberry Pi Models for This Project?
Absolutely! While I often recommend the Raspberry Pi 3 or 4 for their processing power and connectivity options, other models, including the Zero, can also work well depending on your project’s requirements. Here’s a quick rundown:
- Raspberry Pi Zero: Ideal for smaller, less demanding projects.
- Raspberry Pi 2: A budget-friendly option for simple tasks.
- Raspberry Pi 3/4: Best for more complex projects that require more power and faster networking.
Choose the model that best fits the scale and complexity of your IoT endeavor.
Do I Need Any Prior Programming Experience?
While having some programming experience can certainly help, it’s not strictly necessary. There are plenty of resources and communities online that can help you learn as you go. The most important thing is your willingness to experiment and learn. With the step-by-step instructions provided, even beginners can successfully complete this project.
How Can I Ensure My IoT Project Is Secure?
Security is a paramount concern in IoT projects. Here are some steps to help secure your setup:
- Use encrypted communication protocols like SSL/TLS for data transmission.
- Implement secure authentication methods for devices connecting to your network.
- Regularly update your Raspberry Pi, Arduino, and any other components with the latest security patches.
- Consider using a VPN or other network security tools to protect your IoT devices from external threats.
By taking these precautions, you can help safeguard your IoT project against potential security risks.
What Are Some Creative Ways to Expand My IoT Project Beyond This Guide?
The possibilities are nearly endless. Here are a few ideas to spark your imagination:
- Integrate with AI services to predict environmental changes or detect anomalies.
- Connect multiple RuuviTags to create a mesh network for wider area coverage.
- Develop a mobile app that alerts you to specific sensor readings.
- Use the data from your sensors to automate other devices in your home or office.
Remember, the beauty of IoT is in its versatility and scalability. Start with a simple project and gradually add complexity as you become more comfortable with the technology.
Integrating RuuviTag sensors with a Raspberry Pi and Arduino can create a powerful IoT solution for a variety of applications. For instance, in urban smart greenhouses, this setup can monitor environmental conditions such as temperature, humidity, and air pressure in real time. By leveraging the capabilities of both the Raspberry Pi and Arduino, users can automate processes, optimize conditions for plant growth, and even save on energy costs. For a step-by-step guide on how to integrate these technologies, check out our article on smart greenhouse gadgets.