Article-at-a-Glance
-
Scout the ideal location for your greenhouse, considering sunlight and protection.
-
Gather essential, simple tools for your DIY greenhouse construction.
-
Choose a greenhouse design that fits your budget, with options to adjust for cost.
-
Source secondhand supplies and repurpose materials to save on costs.
-
Build a solid, cost-effective foundation to ensure the longevity of your greenhouse.
Seed to Sanctuary: Your Budget Greenhouse Building Guide
Whether you’re an experienced gardener or a newbie with a green thumb itching to grow, a greenhouse can be a game-changer. But let’s face it, the cost can sometimes be a barrier. That’s why I’m here to share with you a treasure trove of tips and tricks for constructing your very own greenhouse on a budget. You don’t need a hefty wallet, just a dash of creativity, some elbow grease, and the right guidance.
Scouting the Perfect Spot for Your Greenhouse
First things first, let’s talk location. The right spot for your greenhouse is crucial for its success. You’ll want to pick a place that gets plenty of sunlight, at least six hours a day. Watch out for shadows cast by trees or buildings, especially during the winter months when the sun is lower in the sky. Besides that, consider protection from strong winds which could damage your greenhouse. A spot with a bit of natural shelter, like a fence or some trees, can be ideal. Remember, your plants will thank you for the spot you choose, because it’s all about giving them the best chance to thrive.
Simple Tools You’ll Need to Begin
Before you start building, you’ll need some basic tools. Don’t worry, I’m not talking about anything fancy or expensive. Here’s what you should have:
-
A tape measure for getting all your dimensions right.
-
A level to make sure everything is perfectly horizontal and vertical.
-
A hammer for all your nailing needs.
-
Screwdrivers, both flathead and Phillips, for assembling parts.
-
A saw, a hand one will do, for cutting wood or PVC.
-
Utility knife for cutting plastic sheeting or shade cloth.
-
Staple gun for securing your greenhouse cover.
With these tools in hand, you’ll be well-equipped to tackle the construction of your greenhouse.
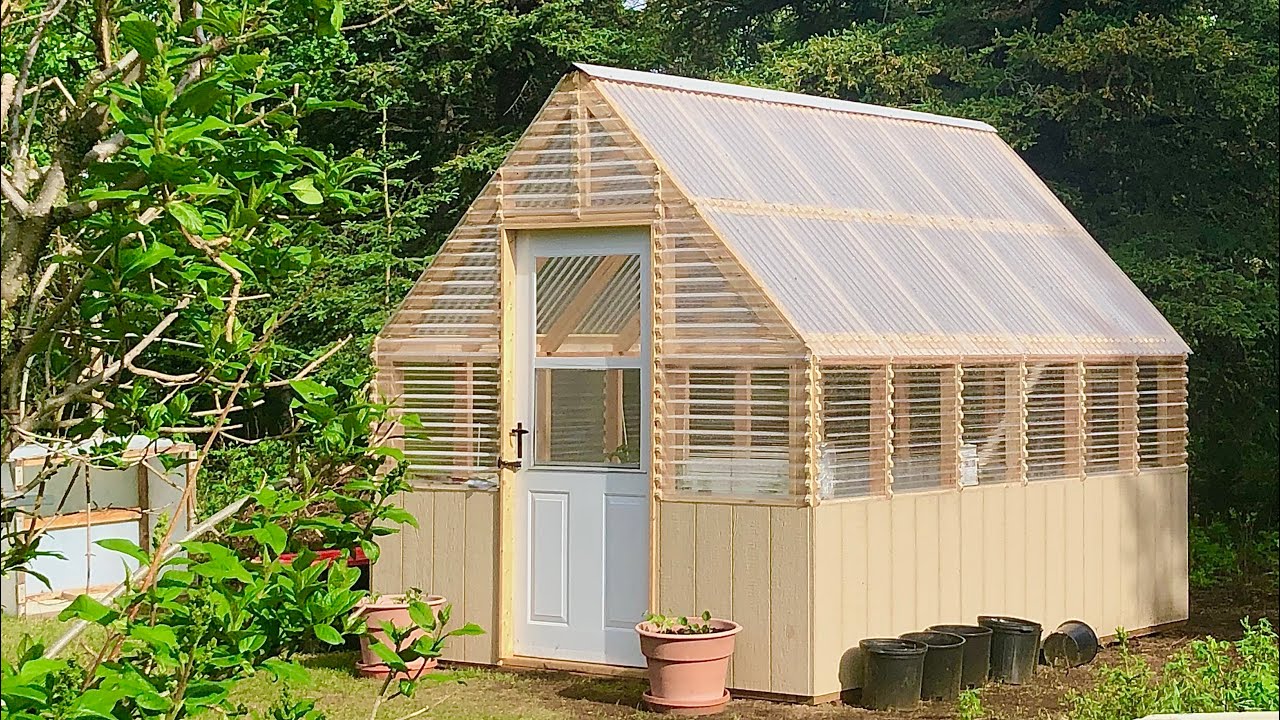
“Small DIY Greenhouse – YouTube” from www.youtube.com
Blueprint for Success: Choosing a Design That Fits Your Budget
When it comes to greenhouse designs, there’s a wide variety to choose from. The key is to pick a design that not only suits your needs but also fits your budget. You might be tempted by the fancy models with all the bells and whistles, but remember, the goal is to grow plants, not to break the bank.
Reputable Sources for Cost-Effective Plans
There are plenty of free or inexpensive greenhouse plans available online. Look for plans from reputable sources like university agricultural extensions or well-known gardening communities. These plans often come with a list of materials and step-by-step instructions, making it easier for you to budget and build.
Adjusting Plans to Reduce Costs
If you find a plan you like but it’s a bit too pricey, don’t be afraid to adjust. Maybe you can use a less expensive material for the frame or find a cheaper alternative for the glazing. Just make sure any changes you make don’t compromise the stability or functionality of your greenhouse. It’s all about smart compromises.
Gathering Materials Without Overspending
Now, let’s talk materials. This is where you can really save some money if you’re clever about it. You don’t always have to buy new. In fact, reusing and repurposing materials not only saves you money but also helps the environment.
Hunting for Deals: Secondhand Supplies
Keep an eye out for secondhand building materials. Check out local online marketplaces, garage sales, and salvage yards. You’d be surprised at what you can find – everything from windows that can be repurposed as greenhouse panels to old wood that can still serve as a sturdy frame.
The Art of Repurposing: Creative Material Solutions
Repurposing is your best friend when building a greenhouse on a budget. Old pallets can be transformed into shelving, and discarded plastic bottles can become part of a wall. Be creative! Just make sure the materials you choose are safe for your plants and durable enough for your greenhouse structure.
The Foundation: Starting Your Greenhouse on Solid Ground
A solid foundation is essential for the longevity of your greenhouse. It doesn’t have to be expensive, though. There are cost-effective options that still provide stability.
DIY Foundation Options That Save Money
You can opt for a simple wooden frame anchored into the ground or use concrete pavers that are both affordable and easy to install. Another option is to create a gravel base, which provides excellent drainage and is cheaper than pouring concrete.
-
Wooden frame: Economical and straightforward to construct.
-
Concrete pavers: Low-cost and easy to lay down.
-
Gravel base: Affordable and great for drainage.
Choose the foundation that best suits your site and budget, and you’ll be on your way to a stable and lasting greenhouse. For detailed instructions, you might want to check out this guide on how to build a greenhouse cheap.
Ensuring Stability and Longevity
Regardless of the foundation you choose, make sure it’s level and well-anchored. This will prevent your greenhouse from shifting or toppling over in harsh weather. A level foundation also ensures that water distributes evenly, which is important for plant health.
Selecting Inexpensive yet Strong Materials for Framing
-
PVC pipes: Lightweight, easy to work with, and resistant to rot.
-
Rebar: Sturdy and can be bent into different shapes for custom designs.
-
Wood: A classic choice, but opt for treated or naturally rot-resistant varieties.
-
Aluminum: Durable and rust-proof, though typically more expensive than other options.
When you’re building a greenhouse, the frame is like the skeleton—it needs to be strong to support everything else. You don’t need to splurge on materials for a robust frame. PVC pipes are a popular choice because they’re affordable and easy to assemble. Rebar is another great option, especially if you’re going for a dome design. It’s strong and can be easily shaped to fit your needs.
Wood is a classic choice and gives a natural look to your greenhouse. If you go this route, make sure to use treated wood or naturally rot-resistant species like cedar to prevent decay. While aluminum is a bit pricier, it’s incredibly durable and rust-resistant, making it a long-term investment.
Most importantly, consider the climate you’re in. If you live in an area with heavy snowfall, you’ll need a stronger frame to bear the weight. In windier locales, a low-profile, sturdy structure will stand up to gusts better than a tall, skinny one.
Remember, the frame not only supports the greenhouse, it also determines the shape and size. Think about what you’ll be growing and the space you have available. This will guide you in selecting the best material for your needs.
Piecing Together the Puzzle: Frame Assembly Tips
Putting together the frame of your greenhouse can be a bit like solving a puzzle. Here are a few tips to make the process smoother:
-
Start by laying out all the pieces on the ground to get an overview of the construction.
-
Use corner joints or connectors specifically designed for the material you’re using, whether it’s PVC, wood, or metal.
-
Assemble the frame section by section, making sure each piece is firmly connected and secured.
-
Double-check that everything is square and level as you go to prevent issues later on.
-
Consider adding diagonal braces for extra stability, especially if you’re in a windy area.

“Assembling used greenhouses …” from www.flowerpotman.com
By following these steps, you’ll create a sturdy structure that’s ready to be covered and filled with life.
Clarity Ahead: Affordable Glazing Techniques
Glazing is what covers your greenhouse, letting light in and keeping the elements out. Traditional glass is beautiful, but it’s also expensive and fragile. There are plenty of affordable alternatives that will do the job just as well, if not better.
Low-Cost Glazing Alternatives to Glass
If you’re looking to save money, here are some glazing alternatives to consider:
-
Polycarbonate panels: They’re nearly as clear as glass, but much more durable and often less expensive.
-
Fiberglass: It’s lightweight and easy to work with, though it may yellow over time.
-
Plastic film: The cheapest option, but it will need to be replaced every few years.
Each of these materials has its pros and cons, but they all provide the essential function of letting light in while keeping cold and pests out. Your choice will depend on your budget, the look you want, and how long you want it to last.
Installing Your Glazing: Step-By-Step
Once you’ve chosen your glazing material, it’s time to install it. Here’s how to do it:
-
Measure your greenhouse frame and cut your glazing material to fit. Leave a little extra on all sides for a snug fit.
-
If you’re using panels, secure them in place with screws and washers to prevent cracking. For film, stretch it tight and staple it to the frame.
-
Seal the edges with weatherproof tape or a silicone sealant to keep out drafts and water.
Take your time with this step. Proper installation will ensure that your greenhouse is well-insulated and lasts for years.
Breath of Fresh Air: Ventilation on a Budget
Good ventilation is key to a successful greenhouse. It regulates temperature, prevents disease, and encourages pollination. You don’t need fancy equipment to achieve this, sometimes, the simplest solutions are the most effective.
Manual vs. Automatic Ventilation Solutions
When it comes to ventilation, you have two main choices: manual or automatic. Manual vents are less expensive and can be as simple as propping open a window or door. Automatic vents have temperature-sensitive openers that do the job for you but will cost a bit more. Consider your climate and how much time you can dedicate to monitoring your greenhouse when deciding between the two.
Do-It-Yourself Vent Installation
Installing vents is a straightforward process:
-
Decide on the number and placement of your vents. A good rule of thumb is to have at least one square foot of vent for every ten square feet of floor space.
-
Cut openings in the frame for your vents, making sure they’re high up to allow hot air to escape.
-
Attach the vents with hinges at the top and add a simple latch at the bottom.
If you opt for automatic vents, install the temperature-sensitive openers according to the manufacturer’s instructions. These can be a lifesaver if you’re not around to monitor the greenhouse temperature throughout the day.
Interior Design: Functional Inside Space Planning
The inside of your greenhouse should be a functional space where plants can thrive. Planning is key to making the most of the space you have.
Start by considering the path of the sun and how it moves across your greenhouse. Place taller plants on the north side so they don’t shade smaller ones. Think about workflow, too. You’ll want enough space to move around comfortably, tend to your plants, and enjoy the fruits of your labor.
Constructing DIY Greenhouse Shelving
Shelves are essential for maximizing space in your greenhouse. You can build them yourself with some simple materials:
-
Use cedar or treated lumber to prevent rot. You can also use metal or PVC for a more industrial look.
-
Make sure your shelves are at a comfortable height for you to work at.
-
Leave enough space between shelves to allow light to reach all your plants.
With some basic carpentry skills, you can create custom shelving that fits your greenhouse perfectly.
For example, a simple and effective shelving unit can be made by stacking cinder blocks and laying planks of wood across them. This setup is not only cost-effective but also adjustable and sturdy.
Shelves like these provide flexibility and can be rearranged as your plants grow and your needs change. For more details on building your own greenhouse shelving, you can check out this guide on how to build a greenhouse cheap.
Effective Plant Layouts for Optimal Growth
Now, let’s talk about layout. The way you arrange your plants can have a big impact on their health and your harvest. Here are some tips:
-
Group plants with similar needs together to make watering and care easier.
-
Use vertical space by adding trellises or hanging baskets for climbing plants.
-
Leave enough space between plants for air circulation, which helps prevent disease.
A thoughtful layout not only makes your greenhouse more efficient but also more enjoyable to work in. It’s like creating a little ecosystem where everything has its place.
Domesticating the Elements: Temperature and Humidity Control
Managing temperature and humidity is crucial for your plants’ health and growth. Luckily, you don’t need expensive equipment to keep these elements in check.
Passive Heat Sources to Minimize Costs
Passive heating can be a cost-effective way to maintain temperature in your greenhouse. For more insights, explore this guide on building a simple, inexpensive greenhouse which can include passive heat strategies.
-
Place large barrels of water inside your greenhouse. They’ll absorb heat during the day and release it at night, keeping the temperature steady.
-
Use dark-colored materials for your floor or walls. They’ll act as heat sinks, absorbing warmth when the sun is out.
-
Make sure your greenhouse is well-insulated. Bubble wrap can be an inexpensive insulation material for windows and walls.
Maintaining Humidity Without High-Tech Gear
Humidity is just as important as temperature. Too much can lead to mold and disease, while too little can stress your plants. Here are some tips for managing humidity:
-
Water your plants in the morning so excess moisture has time to evaporate during the day.
-
Use a simple fan to improve air circulation and help control humidity levels.
-
Create a gravel tray for your pots. As water evaporates from the gravel, it will increase humidity around your plants.
Tools of the Trade: Essential Tools for Greenhouse Building
Building a greenhouse requires some basic tools. You likely already have many of these in your toolbox, and the rest won’t break the bank.
Basic Hand Tools to Get the Job Done
Here’s a list of the hand tools you’ll need:
-
A tape measure for accurate measurements.
-
A level to ensure everything is straight and even.
-
A hammer for securing structures.
-
A variety of screwdrivers for different types of screws.
-
A saw for cutting wood or plastic.
-
A utility knife for precision cuts on materials like plastic sheeting.
-
A staple gun for attaching coverings to the frame.
Power Tools Worth Investing In
While hand tools can get you far, a few power tools can make the job easier and faster:
-
A cordless drill for quick and easy screwing and drilling.
-
A circular saw if you’re cutting a lot of wood or thicker materials.
-
An electric stapler to save time and hand fatigue.
Smart Watering Solutions: Irrigation Within Reach
Proper watering is essential for your greenhouse plants. You can set up an efficient irrigation system without spending a lot of money.
DIY Irrigation Systems on a Dime
Here’s how to create a simple, cost-effective irrigation system:
-
Use soaker hoses or drip lines to deliver water directly to the plant roots.
-
Collect rainwater in barrels to use for watering, which is better for your plants and saves on your water bill.
-
Consider a timer to automate watering, ensuring your plants get the right amount of water even when you’re not around.
Water Conservation Techniques for Greenhouse Gardeners
Conserving water is not only good for the environment but also for your wallet. Here are some water conservation tips:
-
Water early in the morning or late in the evening to reduce evaporation.
-
Use mulch to keep the soil moist longer and reduce the need for frequent watering.
-
Regularly check for leaks in your system to prevent water waste.
The Finishing Touch: Doors, Flooring and Weatherproofing
The final touches on your greenhouse will make it a complete, functional space for your plants.
Constructing a Functional Door without Splurging
A door doesn’t have to be expensive. You can build a simple, functional door using a wooden frame and covering it with the same material as your greenhouse walls. Add hinges, a handle, and a latch, and you’re all set.
Choosing and Installing Budget-Friendly Flooring
For flooring, consider these options and read our greenhouse growing guide for beginners for more detailed information.
-
Gravel is inexpensive, provides good drainage, and is easy to walk on.
-
Concrete pavers are another budget-friendly option that offers a more solid walking surface.
-
Wood chips or straw can be a cheap and effective temporary solution.
Effective Weatherproofing
Finally, ensure your greenhouse is weatherproofed. Seal any gaps with weatherstripping or silicone caulk. This will keep your greenhouse warm and prevent any pests from getting in.
FAQ
Here is the most common question and straightforward answers to help you with your DIY greenhouse project.
What are the most cost-effective methods for constructing a greenhouse?
The most cost-effective methods include:
-
Using repurposed materials like old windows or pallets.
-
Building a smaller greenhouse, as smaller structures require fewer materials.
-
Opting for a simple design that doesn’t require complicated construction or expensive materials.
-
Doing the work yourself to save on labor costs.
With these tips and a little bit of ingenuity, you’ll be able to build a greenhouse that suits your needs without emptying your wallet. Happy gardening!
Building a greenhouse can be an exciting project for any gardener. It allows you to extend the growing season and protect your plants from harsh weather conditions. Whether you’re looking to grow vegetables, flowers, or herbs, a greenhouse provides a controlled environment where your plants can thrive. To get started, you’ll need some basic materials like PVC pipes, plastic sheeting, and a suitable location that gets plenty of sunlight. It’s important to consider factors such as greenhouse humidity control and insulation to ensure that your plants get the ideal growing conditions. With some planning and effort, you can build a budget-friendly greenhouse that will serve you for many seasons to come.